Lots of people have made a cake like this, but I'm going to give you a few little instructions and hints. Let's call it a tiny tutorial!
You need a few things: a ribbon cutter ( or not if you want to take 4 times as long), a poking tool (something with a dull end-aka not pointy), and a small knife. I used a gumpaste and Fondarific combination. I love the extra working time that the Fondarific gives me. Now a pasta machine is great! But if you are going to make one of these, don't make the investment.
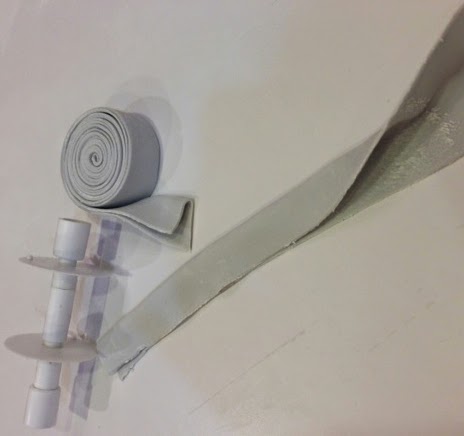
I rolled the fondant pretty thin and in long pieces. A #4 on the pasta machine. Using my ribbon cutter with a 1-1/2" space, I cut as many strips as I could. I used plenty of cornstarch on the bottom and top of the strips. I then folded the strips in half longways with a slight crease. I then rolled up the strips in nice little pinwheels. Then store them in a ziplock bag until you have a bunch and are ready to put them on the cake.
I used a large circle cutter to mark all the "roses" that I was going to need. Then starting on the outside I started applying to the cake using the little tool to slightly adhere it to the cake. I was working on a buttercream cake that does not crust, so it went right on and stayed. You may need to apply gum glue or piping gel to make things stick.
I went back to the strip I just applied and poked it further so it would be more secure and fluffed it at the same time. Now keep going and going......
Once all the roses were done , I started added the fill in pieces. I developed more of a system the longer I did it. I put as long of a strip as you can handle. Having them in rolls helps you handle lots of the material at one time. When I got to the smaller pieces, it was best to make a zig zag Christmas tree sort of thin and then fitting it in the hole. Then go back and attach and fluff.
Lastly, I did use some very small pieces of foam to keep any very tight or heavy areas up and to keep them from being all flat. This was really important on the top of the cake when everything was laying so flat. This was a 12" round cake and it took me about 7 hours to get all the ruffles finished. Please be sure to charge accordingly.


Very Nice! Thank you for this tutorial. May I ask if your icing is SMBC?
ReplyDeleteHi Jeanne! I only use an all-butter ABC and a French buttercream for my cakes. The French is very close to SMBC, except French uses the yolks too. This technique should work just fine with SMBC. Thanks for stopping by!!
DeleteThank you for the tutorial!
ReplyDeleteThanks for posting this! I have a cake in June to do this technique on. I'm planning to use modeling chocolate. I hope it works
ReplyDeletegreat tutorial! best advice "please be sure to charge accordingly" amen!
ReplyDeleteThank you for the tutorial, I have always wonder how to make this type of roses.
ReplyDeleteHave a good weekend!!
Hello Jenniffer, great tutorial. Thanks for sharing.
ReplyDeleteHave a good week!!
Xènia Roca