Tuesday, April 29, 2014

Ruffle Ribbon Rose Tutorial

Lots of people have made a cake like this, but I'm going to give you a few little instructions and hints. Let's call it a tiny tutorial!

You need a few things: a ribbon cutter ( or not if you want to take 4 times as long), a poking tool (something with a dull end-aka not pointy), and a small knife. I used a gumpaste and Fondarific combination. I love the extra working time that the Fondarific gives me. Now a pasta machine is great! But if you are going to make one of these, don't make the investment.

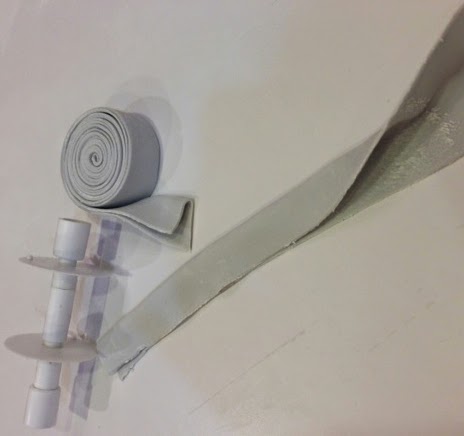
I rolled the fondant pretty thin and in long pieces. A #4 on the pasta machine. Using my ribbon cutter with a 1-1/2" space, I cut as many strips as I could. I used plenty of cornstarch on the bottom and top of the strips. I then folded the strips in half longways with a slight crease. I then rolled up the strips in nice little pinwheels. Then store them in a ziplock bag until you have a bunch and are ready to put them on the cake.

I used a large circle cutter to mark all the "roses" that I was going to need. Then starting on the outside I started applying to the cake using the little tool to slightly adhere it to the cake. I was working on a buttercream cake that does not crust, so it went right on and stayed. You may need to apply gum glue or piping gel to make things stick.


I went back to the strip I just applied and poked it further so it would be more secure and fluffed it at the same time. Now keep going and going......


Once all the roses were done , I started added the fill in pieces. I developed more of a system the longer I did it. I put as long of a strip as you can handle. Having them in rolls helps you handle lots of the material at one time. When I got to the smaller pieces, it was best to make a zig zag Christmas tree sort of thin and then fitting it in the hole. Then go back and attach and fluff.


Lastly, I did use some very small pieces of foam to keep any very tight or heavy areas up and to keep them from being all flat. This was really important on the top of the cake when everything was laying so flat. This was a 12" round cake and it took me about 7 hours to get all the ruffles finished. Please be sure to charge accordingly.

Tuesday, April 22, 2014

Ruffle Ribbon Rose Wedding

We were asked to recreate an almost exact copy of a cake from the Pastry Studio.  I have been getting involved with some more FB groups and noticed people saying that you should ask permission before recreating a design that you copy.  I guess in a perfect world with lots of time and super polite people that may happen, but this is not that world.  I'm not going to lie and say that I ask other cake people, wrapping paper designers, or invitation designers for their permission when I draw inspiration from their designs.  I have friends that say they WILL NOT recreate another person's cake or even their own.  I have tried many times to sway a bride to my design but many times they are insistent on a certain cake with NO changes. 
I try to alter it but I can only push so much.  I don't want to lose the sale!  I would if I told them "No, you can't have what you love and dream of."  Does that mean I am an awful thief? I just can't accept that.  If you put your work out there to inspire brides and decorators, you shouldn't be mad when they want it.  I see copies of my stuff all the time, especially in my local area.  What I hate is when a local competitor knows your price for your cake and tries to undercut you to get the order, but that's a whole other topic.  I make sure to verbalize and have in my contract that my work will differ from another baker even when I'm trying to be exact.  I still feel guilty about using someone else's design and I won't be using these types of cakes on my new updated website in the future.

Please weigh in and feel free to tell me your thoughts on the matter.  We can have varying opinions and still be friends, right?

Tuesday, April 15, 2014

Sugar Dress Pink Lace Cake

I have tried so many lace making products that I almost gave up.  When SugarVeil came out, I thought it was cool but all the mats were kind of tacky (just my opinion). It really did take a while for some better mats to be developed but they are expensive.  I have used SugarVeil in a piping bag so that I could pipe onto parchment with a complicated pattern underneath.  Once dried, I could pick it up and adhere it to the cake.   I can be a real chicken when piping black icing on a white cake!  The thing I don't like about SugarVeil is that it takes a while to dry and it dries out very quickly.  Keep your finished pieces wrapped well in cling wrap or it will be very brittle and fall apart. 

When I saw a video on Icing Inspirations about their new product, Dab, I bought six!  It looked so easy, is ready immediately and they said it stayed flexible.  I tried so many times but I could not get the STUFF to cooperate.  It is really hard on your hands! I still don't know how to make that product work.


Now I have found Sugar Dress.  It is easy to mix, I've even done it by hand. You can speed the process in the oven and it stays flexible for a long time. It is also very strong so when you take it out of the molds it stays in one piece.  It's a little pricey, but so are the two mentioned above.  You can find it on Amazon, so that is good for Amazon Prime members because free shipping!

The mat from this cake was purchased from All About Cake Art"Virginia" is the name of the mat and it's $48.50

They have some pretty ones.  I've also found several mats on Etsy that are much cheaper but don't always come in the sizes promised so read the reviews. 
https://www.etsy.com/shop/GLOBALPAFMOLDS
https://www.etsy.com/shop/RomanticCraft


Tuesday, April 8, 2014

Collaborations Can Be A Blast!

I have talked before about the importance of having cake friends.  It's nice to have someone to complain to and to bounce ideas off of, but sometimes you get to collaborate on really cool projects.

Our friends Kimberly and Andrew of Couture Cakes were asked by country music super-station US 101 to do a cake for the Heartstrings for Hope concert benefiting St. Jude.  On these types of cakes there is SO much to do, and they asked us if we would like to help out.  In return, we would be their guests at the concert.


They know of our (OK, Chaddy's) prowess with logos and the cutting machine, so they gave us a list of words and the US 101 logo and we started rolling out modeling chocolate.  I came up with a really cool trick while working on all these millions of letters.  I used strips of parchment paper with some vegetable shortening on it an used that to adhere the paper to the FRONT of the letters.  The spacing is kept in tact.  They were easy to apply to the cake too - just apply a little tylose glue to the back of the letters and place them against the cake.  Hold your hand over the paper and the heat from your hand will release the shortening.  Easy peasy!


We ONLY did the words & logos on this cake...

So here's the cake and it turned out amazingly, don't you think?  Andrew did an absolutely perfect job sculpting each of the artists Which included Randy Houser, Tyler Farr, Kelly Lovelace, Jared Neimann, and Sheryl Crow!  We were also treated to a backstage meet and greet - getting to meet all of those talented artists was almost as much fun as helping out our friends!


Tuesday, April 1, 2014

The Caped Crusader vs The Evil Cake Genius

Most of us have heard of Robin Martin and the amazing cakes she makes at Gateaux... But have you seen some of the awesome cake toys she offers over at Evil Cake Genius?

They make some of the most awesome stencils I have ever seen!  They are a little expensive, but they are really nice!  Some are standard stencils, but some are printed on a ribbon type material and works a lot like a silk screen.  I haven't tried the silk screen types yet, but I used the Skyscraper Windows stencil to make this birthday cake for a huge fan of the Caped Crusader.

Everything else on this cake is either buttercream or modeling chocolate.  Speaking of modeling chocolate, you guys know that I love the stuff, but lately I have been having some pretty fierce condensation issues with my modeling chocolate.  Anybody else experience this?  If so, let's talk through it in the comments! 


Tuesday, March 25, 2014

Sketchy Cake Designs

Click to Enlarge Image
When most everything you make is a custom design, you have to make a lot of sketches.  The only thing I like about recreating an exact copy of a cake is that I don't have to draw it out.  I can decorate cakes, I can't draw :(  My art teacher in high school told me that most people that are great artists, whether drawing, painting or sculpting, don't just wake up great.  She said that for 98% of artists, it's a skill that you learn over time.  I really don't think that occurred to me until then.  Now I know that it is true in most everything we do.  Things that used to take me forever are now easier.  I'm still pretty pitiful at sketching cake designs though.

Customers have to see a sketch of what they are getting because most people can't visualize all the things they are hearing.  It helps me too!  I can see the general idea and make changes when booking the cake instead of the day I'm decorating it.  The better the sketch, the easier it is for someone to "see" it.  Also, it helps bakers to come across as professional or not so much.  It is something we have to do, so we'd better get used to it!

Click to Enlarge  Image

Currently, I have PowerPoint templates that I've made and I "draw" on those.  If I can color them in the program, or use clip art, it does help a little, but it's still not at all realistic.  I've been trying the Tiered Caker iPad app and printing those out to draw on.  I really like the realism that they show, but I can't do "weird" things in the program, like adding a skull tier or flowers as a separators.  Also, when I'm just trying to show texture or white on white decorations, I have to pencil them in and that makes it very hard for them to visualize the final cake.

I'm including two of my current sketches so that you can "grade" me and tell what you think I could do differently.  I recently watched a CakeFu by the awesome Liz Marek about digital cake sketching.  She has lots of video's and even a Facebook page for Cake Sketching.  I really like what she does and I wish I had that kind of time just to make a sketch.  She said that it can easily take an hour per sketch.  Like I said, I want to be able to do that, but it just doesn't seem to be practical.  Am I just whining and need to get over it?  I'm clearly not going to be able to draw it free hand, so something has to give.  Keep in mind, these sketches aren't "bad" ones!  Thanks so much for your input!

Tuesday, March 18, 2014

Stencilled Buttercream Cake

There is a private girls school in Chattanooga, Girls Prepatory School or GPS, and we have been making the rounds there lately.  We were asked to make a cake for a "Chapel Talk" event.  A senior student is asked to give a talk, during chapel (seeing a theme?) and then host a little tea party kind of event.  We were given colors of Navy and pink and we came up with this cake.  What is funny about it to me, is that the design would have worked when I was in high school, many years ago.  Preppy has not gone out of style since the 80's.  Polo shirts, pearls, bows in your hair and monograms have always been in style in our town.  Is that just a Southern thing?   Perhaps, but I think we will check back in ten years from now and see if it's still "in".  Maybe moon boots and hoverboards will be in?

This was a very easy cake to make so I won't pretend otherwise, but I will give you a few helpful hints.  First, when you are using buttercream icing and then stenciling on top with more buttercream icing, cold is your best friend.  I made the oval plaque by applying the middle letter, chilling the plaque and repeating the process.  The boo boo here is that the top "F" is slightly thicker than the other two letters.  You "should" look at the thickness closely before removing the stencil otherwise you are stuck with the decoration or you have to start all over.  I guess my patience was short this day. :)
   
I did have a little problem with the bottom tier stencil, but this is a design that you can pipe a little to fix the blemishes.  Also, use Fondarific for your pearls.  It will chill up and hold the shape so the pearls don't get distorted when removing from the mold or applying to the cake.  Sometimes I will put the pearls on as I take them out and other times I have to wait so I will make a bunch, then chill and apply.  If you see a cake with distored pearls, the decorator either didn't use the right product or hurried the process too much.  You can use modeling chocolate also, but the Fondarific "wedding white" matches my all butter-buttercream perfectly.  I also add whitener and a drop of purple (to counter act the yellow) to the outside layer of buttercream to brighten it.  It's still not bright white.

Lastly, making the color navy is not as easy as you would think.  This is a great chart for coloring fondant, but I think it also applies to buttercream.  Please know that colored buttercream gets darker as it sits, so make it 24 hours in advance so you can see the final color.
 
Here is a coloring chart for royal icing, but again it's a good general chart


And lastly, I found this to be so very interesting!  A chart on what happens to leftover colors when you add ivory or black.  Super good reading!  http://www.sweetsugarbelle.com/2012/04/my-ramblings-on-icing-color-and-some-easter-cookies/

I hope you get to make or receive a timeless cake this week! 

Items I used to create this cake: 


FULL DISCLOSURE:  As a member of the Amazon Affiliate program, I receive a small commission if you buy a product from the links on my blog.  I actually own the products I recommend and all thoughts and opinions are my own.

Tuesday, March 11, 2014

Our 5th Blogiversary!


We are five years old this week! Well actually The blog is five years old this week! Our little business is more along eight years old now. Time flies by when you are baking cakes! To be honest, 2013 was not a great year for business. Our sales were almost half of 2012 and 2011. It was a challenge some weeks to bring you a cake and blog worth reading, but I hope we did. We really do wish more people that read the blog would leave comments. There is a small faithful handful of you that are there every week with sweet and encouraging words. To you guys, we want to extend our wholehearted thank you! It truly does put "fuel" in our little blogging engine. See what I did there? I know signing up for a Google account takes a few minutes, but please do it. Little blogs like us really like to know you are there and that we aren't talking to the wind. I am not the type of a girl seeking praise for cakes. I really want feedback, opinions and requests for content. We are working on some new videos for the upcoming year. If there are things you want us to show, teach, or complain about, just let me know.
 
Lastly, I wanted to thank Chad for keeping this blog going. It is only because of him that this part of our story continues. That man will not let me skip a week because we have to "be consistent". There are many times that I try to bring him to the dark (lazy) side, but the man is committed and it's one of my favorite things about him! 

Tuesday, March 4, 2014

Bar Mitzvah Tennis Cake

This week I want to tell you about the Bar Mitzvah cake I made to go with last weeks Bat Mitzvah cake. What a big party these twins had! Huge decorations, beautiful lighting and great food all at The Chattanoogan Hotel. They had to have wonderful cakes to match the event. When I met the clients, the birthday girl knew she wanted a giant fancy cake. On the other hand, the young man was so easy going that it made a problem. He wanted a sheet cake with a score board, that was all. I suggested some options to make it more grand to be on scale with the girl's cake, but he wasn't having it. Long story short, the parents almost didn't book the cake because they didn't want to spend so much on a "sheet cake". I had sketched out a 3 layer rectangle tennis court (not exactly a sheet cake!), with bleachers on two sides and a scoreboard on one of the long sides. When I found out about their reservations, I decided to sketch out a whole new design concentrating on what would match the size/scale of the girl's cake and not limit myself to the original instructions. Everyone was happy! Then all I had to do was make the cakes....

The cake itself was not hard, just very large. I used a half sphere of styrofoam for the bottom of the ball cake. The darned thing still wasn't perfectly round. I didn't trim enough off the cake half so the middle was too long. I'm not sure if there is a way to check the exact roundness of the cake other than just eyeballing it. Anyone have ideas? We used strips of plain edible image paper for the lines on the court. I really like the look and the flatness of these kinds of lines on a field. I've done it with thin fondant "snakes", but they aren't as pretty. The rest of the cake was pretty plain so I added a few details like tennis balls.

There are things I'm very good at and things that I'm just not. I've still got a lot to learn on a several things, but especially making fondant figures/people. The birthday boy wanted a figure to look like him and one to look like Roger Federer. I should have started those crazy things two weeks earlier, but it did not go down like that. Have you noticed yet that there are no pictures of these figures? Well, I wasn't happy with them so there is no evidence! I have two pieces of advice, because I'm soooo awesome at making people! First, use good modeling chocolate. If it's too soft or on the other end of the spectrum, to cracky, make a fresh batch! Second, watch Artisan Cake Company, AKA Liz Marek, on You Tube. Her fondant figure tutorials are the best that I found! She is awesome! But remember, she makes it looks much easier than it is, at least for me!

Tuesday, February 25, 2014

Bat Mitzvah Fashion Cake

We were so fortunate to be asked to make cake for a Bar Mitzvah and a Bat Mitzvah a little white back.  Today, I want to tell you about the Bat Mitzvah cake.  When I sat down with the family the birthday girl was the first to tell me her vision.  She had it all planned out with pictures and everything.  She brought an inspiration picture from Pink Cake Box and their great artist Ann Heap.  She wanted to remove a lot of the extra "stuff" on the cake like candy that made it more juvenile.  We were also dealing with a budget, so when I was asked to shave a few dollars off of the cake, we removed a company logo and the tissue on the bottom tier.  We were going to have the lid raised a bit with big pieces of fondant tissue coming out.  I was happy with the change because it kept the cake more streamlined.  We already had two tiers with tissue, and that was plenty.

As far as technique for this cake the overall tip is to use modeling chocolate, the kind you make, not the pre-made stuff.  The hatbox was one large cake with four tiers.  I used a grapefruit spoon (which I don't know why I own...) to make the channel for the black tissue.  As normal, make it deeper than you want it to be.  A layer of buttercream and fondant will fill it back in to some degree, so dig a little more out.  I covered that whole tier in white fondant and then added the pink modeling chocolate on top of that.  I I was doing it again today, I would have made one big band of modeling chocolate for the sides or done individual stripes all the way around without any fondant under neath.

The blue box and orange bag are really straightforward.  My tip on those would be to fill in any uneven space with buttercream so that the modeling chocolate doesn't sink in at all.  Corners are notorious for doing that.   I have a pet peeve about droopy corners on all cakes, but that's for another day.  To make the tissue, I got some fondant/gumpaste mix rolled really thin in the pasta machine and cut squares out.  I scrunched them, my technical term...trademark pending.... and fluffed them.  I let them dry a couple of days and didn't put the pieces on the cake until  the morning of the party.  That way the moisture in the fridge didn't make them droopy.  No one wants droopy tissue!

The handbag was a "cheater" handbag. We used edible images for all the print.  I made it the size to fit one full page of print for the front and one for the back.  HA!  It didn't outwit me this time!  Did you know that REAL bags have upside down print on the backside because it's all one piece of leather?  I made sure I was accurate for this birthday girl because she would have known!  For all the tan pieces, I used a stitching tool and it made a big difference in the overal look and detail of the cake.

I was happy with the cake, even though I could have added SO much more to it (makeup, jewelry, etc.) but when we got it to the venue that was decorated beautifully, it fit in just perfect!  The staff at The Chattanoogan Hotel were all coming up and taking pictures and that is a real compliment since they see cakes all the time.

ShareThis

Related Posts with Thumbnails

