Showing posts with label alternative. Show all posts

Tuesday, September 24, 2013

Edible Feather Tutorial


My friend Kimberly told me a while about that she had made peacock feathers using wafer paper.  I was intrigued, so I immediately ordered a package.  And there it sat, for months and months, until I finally needed to make my Gatsby inspired cake for the recent photo shoot we did.  It was so easy to make I thought I would share with you my loyal readers.


WHAT YOU'LL NEED:

1.  Wafer Paper
2.  Picture of your feather
3.  Parchment paper (for tracing)
4.  Marker
5.  Scissors, Exacto knife, or Razor blade
6.  Cutting board or surface
7.  White wire
8.  Tylose glue / Sassie Sap Glue
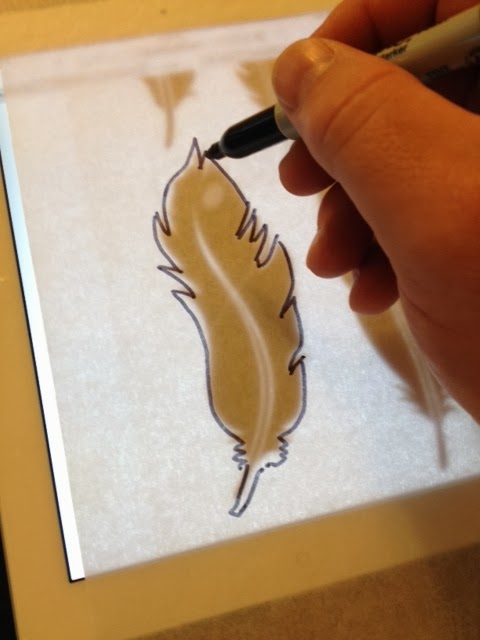

The first thing we need to do is get our feather pattern.  I used this image and enlarged it to the size I wanted on my iPad.  Then I put my parchment paper over it and traced the basic shape of the feather with my marker.
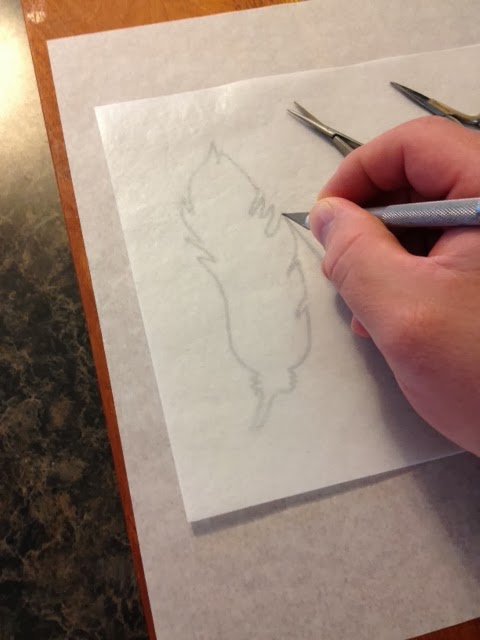

Now that we have an image to cut, just place your wafer paper over the parchment paper.  You can see right through it!  Just cut it gently with your Exacto knife on the cutting board.  The wafer paper cuts easily and with a light hand you won't even cut through the parchment paper.


Pop out your feather and place it back on the cutting board.

Don't draw on YOUR feather!

I made these lines on the wafer paper with a pen, but these are for illustration purposes only.  These lines just represent how you will cut the blades of the feather.


These spring loaded sewing scissors work pretty well, they make tiny cuts, but I found it a little hard to get the cuts deep enough into the feather.


A very sharp Exacto knife goes more quickly and allows you to vary your cuts.  Keep cutting the blades of the feather until your done with both sides.  If you get a couple of jagged edges, it's OK - it's a bird feather!


Now it's time to ruffle some feathers!  Just thumb through the blades to separate them a little.  More if you really want a rustic look!


Now your feather is almost finished!  To put on the cake I used some white wire to go the length of the feather (with some left over to insert) and I adhered it with a little Sassie Sap sugar glue or some tylose glue.

If you enjoyed the tutorial, leave me a comment here and let me know - and don't forget to stop back in next week!

FULL DISCLOSURE:  As a member of the Amazon Affiliate program, I receive a small commission if you buy a product from the links on my blog.  I actually own the products I recommend and all thoughts and opinions are my own. 

Friday, September 16, 2011

Alternative Garnishes for Grooms Cakes

Everybody thinks of the classic groom's cake as a chocolate cake with strawberries or chocolate-covered strawberries.

This was one of those groom's cakes where I was given free reign on the design of the cake.  My only guideline was the color scheme.  Green was the bride's splash color.  So I started thinking of something other than strawberries that I could use to garnish this cake.  As my picture has already given away the surprise, I finally settled on grapes and kiwi fruit.

Now at some point someone bought me one of those fruit garnish kits, you know, like they use to make the edible arrangements? Well I got out my "V"-shaped knife and used it to cut the kiwis.  I really liked the pattern and texture it brought to the cake.

The monogram was a backup I had originally made for the bridal cake, but since both arrived safe and sound, I decided to add it to the groom's cake at the reception hall.  I think it turned out pretty nice.  I bet you're green with envy, right?

Tuesday, October 19, 2010

Trees and Leaves... Well it is that time!

I just love it when we get to make a non traditional wedding cake!  My bride was so fantastic and let me take inspiration from another cake, an invitation, and a save the date card.

It was one of those cakes that would have been pretty if I stopped at the first stage, which was the trees.  It would have been prettier if I stopped at the next stage which was the curly vines.  That was by far the most time consuming.  Getting the little chocolate fondant snakes thin enough while staying even.  I still don't know why I didn't get my clay gun out?!  The one thing that made life easier was that after stacking I put the cake in the cooler for several hours while I worked on other projects.  When I brought it out the condensation made it just the right amount of sticky!  The trees and vines stuck on perfectly.  It was a shame when it dried up and I had to go back to attaching with water or piping gel.  I had it good for a while!

Back to the cake, I then added the leaves and it was prettier....and I could have stopped...but no!  The "Save the date" cards had Autumn colored dots so I added a few.  That is what made the cake for me!  Pop pop pop...dot dot dot!  I used the little circle cutter from Polymer Clay Express.  These will be worth every cent!  I love that site!  The impression mats are good, not to mention the extruder guns.  I liked everything about the cake except for the delivery which was 90 minutes one way and the last 2 1/2 miles was all on a gravel road that was not at all cake friendly!  It was called Laurelwood and it was a beautiful location once we got there!

Friday, November 27, 2009

Wedding Alternative - The Cannoli Tree

From time to time I get a bride that's looking for something different; an alternative for those that just don't care for cake (GASP!) or just want something completely outside the box. Some opt for a cupcake tree. This couple still wanted the traditional wedding cake (see the little basket weave number in the background) but wanted something special on their wedding day. The groom was a HUGE fan of cannolies so we made up a few hundred of them and put them on our cupcake tree stand. We lined the platters with mini chocolate chips which along with being super tasty, also helped cradle the cannolies. A small 6 inch cake was the topper with a little ceramic "just married" car the bride and groom provided. The couple was very happy with their cannoli tree

ShareThis

Related Posts with Thumbnails