Showing posts with label instruction. Show all posts

Tuesday, July 22, 2014

Easy to Make Chinese Takeout Box Cake


I had to make these Chinese takeout box treats for a larger cake recently (coming soon!) and they were actually pretty easy to make!  Want to make your own?

I started with a couple of clean takeout boxes from my favorite Chinese restaurant.  We went there for dinner one night and I just asked them for a couple of extras.  They didn't even charge for them, so that's a bonus!

OK, we're going to use the boxes for 2 reasons - to mold the cereal treats and to make the patterns for the outside of the box, so treat it carefully!

The boxes are wax-coated, but I still gave it a good spray with pan spray so the RKTs wouldn't stick.  Then just pour in the cereal treats, let them come almost to the top (leave maybe 1/2 an inch) and then close the box so that it keeps it's shape nicely while it dries.

Once the cereal treats have set up, you'll want to coat the sides to smooth things out.  In this case I used royal icing.  While that's drying we can make our patterns.

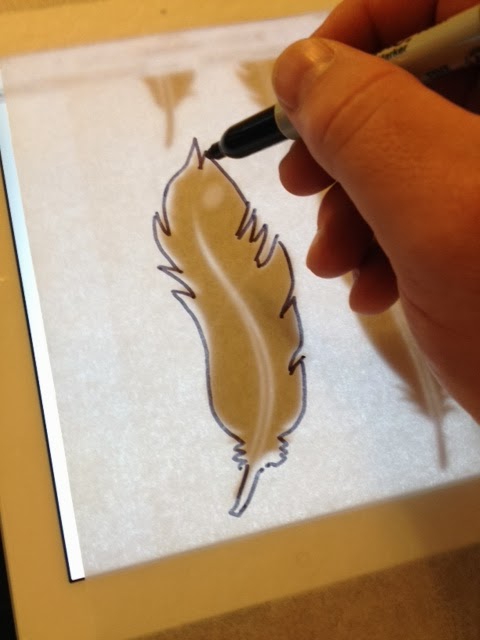
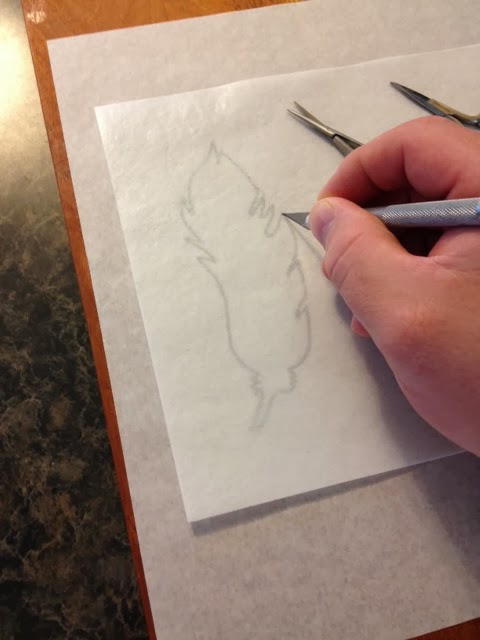
To make your patterns, start by taking out the wire handle.  It was a little difficult to do without messing up the box, but keep at it and you'll get it.  Once the handle is out, the box unfolds nicely.  I used a piece of card stock to draw out the panels around the box, including the top flaps, but not the very bottom.  I then used those patterns to cut each side piece out of white modeling chocolate.  Once you have all your pieces, you can start assembling your box!

I used a little tylose glue on the royal icing start putting on the panels, just make sure you save the overlapping flaps until last.  Now you can start putting in the food!  Use whatever you want for food, but my extruded fondant noodles really did look the most convincing, and I had a blast making cute little noodle loops coming out of the box!  Add your desired logos using edible images and your almost done!

Almost done, why just almost?  Well, at this point you can be done. but my "food" wasn't looking saucy enough until I hit it with a little edible lacquer.  I was really surprised at how that little bit of shine really brought a lot of realism to the piece!

FULL DISCLOSURE:  As a member of the Amazon Affiliate program, I receive a small commission if you buy a product from the links on my blog.  I actually own the products I recommend and all thoughts and opinions are my own.

Tuesday, September 24, 2013

Edible Feather Tutorial


My friend Kimberly told me a while about that she had made peacock feathers using wafer paper.  I was intrigued, so I immediately ordered a package.  And there it sat, for months and months, until I finally needed to make my Gatsby inspired cake for the recent photo shoot we did.  It was so easy to make I thought I would share with you my loyal readers.


WHAT YOU'LL NEED:

1.  Wafer Paper
2.  Picture of your feather
3.  Parchment paper (for tracing)
4.  Marker
5.  Scissors, Exacto knife, or Razor blade
6.  Cutting board or surface
7.  White wire
8.  Tylose glue / Sassie Sap Glue


The first thing we need to do is get our feather pattern.  I used this image and enlarged it to the size I wanted on my iPad.  Then I put my parchment paper over it and traced the basic shape of the feather with my marker.


Now that we have an image to cut, just place your wafer paper over the parchment paper.  You can see right through it!  Just cut it gently with your Exacto knife on the cutting board.  The wafer paper cuts easily and with a light hand you won't even cut through the parchment paper.


Pop out your feather and place it back on the cutting board.

Don't draw on YOUR feather!

I made these lines on the wafer paper with a pen, but these are for illustration purposes only.  These lines just represent how you will cut the blades of the feather.


These spring loaded sewing scissors work pretty well, they make tiny cuts, but I found it a little hard to get the cuts deep enough into the feather.


A very sharp Exacto knife goes more quickly and allows you to vary your cuts.  Keep cutting the blades of the feather until your done with both sides.  If you get a couple of jagged edges, it's OK - it's a bird feather!


Now it's time to ruffle some feathers!  Just thumb through the blades to separate them a little.  More if you really want a rustic look!


Now your feather is almost finished!  To put on the cake I used some white wire to go the length of the feather (with some left over to insert) and I adhered it with a little Sassie Sap sugar glue or some tylose glue.

If you enjoyed the tutorial, leave me a comment here and let me know - and don't forget to stop back in next week!

FULL DISCLOSURE:  As a member of the Amazon Affiliate program, I receive a small commission if you buy a product from the links on my blog.  I actually own the products I recommend and all thoughts and opinions are my own. 

Tuesday, April 3, 2012

New Tutorial - Smooth Square Cakes with Perfect Corrners

About a year and a half ago I recorded my first video tutorial and put it up on YouTube.  The first time I went to Food Blog Forum in Atlanta they advised us to do 2 things:  (1) Expand our experience by doing things we had not tried, and to (2) "find a need and then fill it".  My first buttercream video was my attempt of doing just that.  It was slow to be watched at first, but now after over 20,000 hits there's rarely a day that goes by that I don't get a new subscriber, comment, or "like" on my little video.  It's very satisfying, but it's also a constant reminder that I should probably do more videos.

Well, I finally bit the bullet and made a new video for you guys!  This time I am focusing on getting your square buttercream cakes silky smooth with sharp, crisp, corners.  The process I use is very similar to a round cake, but all those corners and edges really up the difficulty level!  Oh heck, why should you read my babbling when you could be listening to it?! ;-)  See my new video below!

Icing Square Buttercream Cakes Smooth with Perfect Corners

Click Here for the Post that includes my All-Butter Buttercream Recipe

AND THE WINNER IS:  If you entered our giveaway for the FMM Sugarcraft cutters, then today might be your lucky day!  We had quite a few entries, but the lucky winner today is:

Thanks Random.org!

And lucky #13 is Lydia from Ever So Sweet!  Congratulations Lydia, I'll have your cutters in the mail very soon!  And for those of you that didn't win, a 20 minute buttercream tutorial is a pretty decent consolation prize, right?  If you're interested in seeing more video tutorials, either leave us a comment here, or subscribe to our You Tube channel.  Have an awesome week!!

Tuesday, October 18, 2011

Food Blog Forum Nashville Recap

Chaddy and I recently visited Nashville to attend Food Blog Forum,  There were SO many big names there... Jaden Hair from Steamy Kitchen, Todd Porter and Diane Cu from White On Rice Couple, Alison Lewis from Ingredients Inc., Jenny Flake of Picky Palate, Susan Whetzel of Doughmesstic, Lindsay Landis of Love and Olive Oil, there were seriously just too many big names to name!

There's Leah from So How's it Taste? and Shannon from Family Bites

Tuesday, November 16, 2010

How Do I Get My Cakes Smooth? - A Buttercream Tutorial

Since the day I started doing cakes, I have always wanted my cakes to look perfect.  I worked with many different icings and techniques to get them really close, but I always used fondant when I wanted a really smooth finish.  Then I started doing cakes professionally and found out quickly that paying customers don't like the taste or the added expense of fondant.   So I went back to the drawing board and I worked harder and got better with my butter cream skills.  I thought I had finally achieved what everyone else knew.

And then I started blogging and when I began to gain some sort of readership, I started getting comments like "Is that buttercream or fondant?" and "How do you get your buttercream so smooth?".  I was so flattered, and I even promised some of you that I would work on a buttercream tutorial.  And I truly started writing one on several occasions, and it just seemed too hard to capture with words alone.  If only technology provided some way of capturing video and audio in a format that could be played back!

So we cashed in some reward points for a little Sony HandyCam.  And this past week I worked with my husband on my very first video cake tutorial.  It was very scary and while I'm not entirely happy with the results, I do think the results were worthy enough to share with you, my community of cake blogging friends. I would appreciate it if you watched and gave me your feedback.  I would love to know if your cakes get smoother as a result.


This technique works best with an all butter icing.  Feel free to try it with your own recipe, but I am providing my "kids" butter cream recipe if you want to try it.  It's a little on the sweet side, but I find it very workable!

Cup a Dee Cakes Kid's Buttercream Recipe

2 lbs unsalted butter, at room temperature
16 Cups powdered sugar (4 lbs)
1 TBL plus 1 tsp vanilla extract
1/2 tsp salt
1 Cup heavy cream OR light corn syrup (not nearly as good, but works)

In a stand mixer fitted with the paddle attachment add all butter, salt and vanilla to 5 Quart bowl and blend.  Scrape down bowl.  Add ½ of the powdered sugar in stages (put a clean dish towel over the mixer and bowl to keep sugar dust down).  Add all of the whipping cream and blend.  Scrape down bowl.  Add the rest of the powdered sugar in stages until it is blended in.  Scrape down bowl.  Now whip the fool out of it on super high for about 2-4 minutes depending on the strength of your mixer.  The icing will go much lighter in color, fluffier and a good spreading consistency.  You should notice the icing begin to increase in volume (it will fill the mixer bowl).

Note:  This icing is too thick and heavy to spread until you whip the daylight out of it.  Don’t skimp on the final beating.

You can leave the icing out of the fridge for a few days, it will be fine.  Re-whip it when it’s been sitting for the best results.

Icing will not be a bright white due to the color of the butter.  Your can purchase some white food coloring to add to the final layer of icing if needed.  Most people won’t notice that it’s not white and it will photograph better.

Variations

Peanut Butter: Add one 18 oz jar of reduced fat peanut butter for entire batch of icing
Mocha:  Dilute 2 TBL of instant coffee granules in TBL hot water-then add to 2 lbs of icing
Chocolate:  4-6 oz melted chocolate per lb of icing (will be a light brown).
Strawberry or Raspberry:  Add preserves.

Also, as an extra special bonus, here is the icing recipe that Mike McCarey gave us during his modeling chocolate class!

Mike's Buttercream Recipe

1 lb 4 oz powdered sugar
½ cup pasteurized egg whites
2 TBL vanilla
2 lbs (8 sticks) softened butter (unsalted)

In an electric mixer, combine sugar, egg whites and vanilla.  Mix on low to combine.  Increase speed to high and mix for 10 minutes to build volume.  Reduce speed to medium, slowly add softened butter and beat an additional 10 minutes until full volume is reached.  


 If you've enjoyed the tutorial, consider making your next Amazon purchase using my affiliate link.  That way we BOTH win!


ShareThis

Related Posts with Thumbnails